GraphQL & React tutorial (part 6/6)
Learn to write a simple GraphQL server for Taskbox

GraphQL & React tutorial is a series of posts following the development process of an “Inbox Zero” style todo list application, built in JavaScript with the most innovative and production ready tools as of early 2017. Parts: 1, 2, 3, 4, 5, 6.
We’ve managed to get this far in the series without even constructing a server, and this approach has allowed us to build and test a user interface without worrying about the details of the backend. A simple schema has proved enough to get us up to the level of screens.
This series was oriented around building the UI around a Component-Driven Development process, and part of the reason I focused so much on the frontend is that when building a backend, you can really take your pick of technologies, both for the database you use, and the language you run on the server. By following a “schema-first” process, your frontend team really doesn’t need to care.
However, eventually, you do need a server, and this post is a good opportunity to introduce a brand new tool for scaffolding NodeJS-based, MongoDB-using servers. That tool is called create-graphql-server(CGS); I’ll write a little more about the tool itself in a post soon. We’ll be an early user of this new product and build our server with it!
Building an API with create-graphql-server
create-graphql-server(CGS) is a tool that generates the code for a Node+MongoDB-based GraphQL server. The idea is that you provide some simple input (as we’ll see) about the type system, and it generates all the code you need to make that type system a reality. Once you use CGS to generate the initial set of types, the generated code should be clear and understandable enough to tweak to fit your purposes.
As we are using the GraphQL schema as a bright line between our client and server, we could equally use a variety of other technologies to build our server. One choice would be to use a mature development framework (such as Ruby on Rails) and a companion GraphQL library (chances are there is one for your favorite framework already!). Another would be to use one of the “GraphQLaaS” companies that make it easy to build and host a server.
Alternatively, there are some other “automatic” tools in the same spirit as CGS:
- GraphQL Up is a tool to get a Graphcool-backed schema up and running in a similar way to CGS.
- Create GraphQL is another project with similar goals to CGS that generates boilerplate for you.
In any case, CGS will serve our purposes, and generates clean code that we can take further to build a real app from if we are so inclined.
To get started we install CGS and create the app with it:
npm install -g create-graphql-server
create-graphql-server init tasklist-demo-server
cd tasklist-demo-server
yarn
yarn start # this will start a server on port 3000
The server that’s been generated doesn’t do much yet, but we can browse to http://localhost:3000/graphiql to see the embedded GraphiQL client:
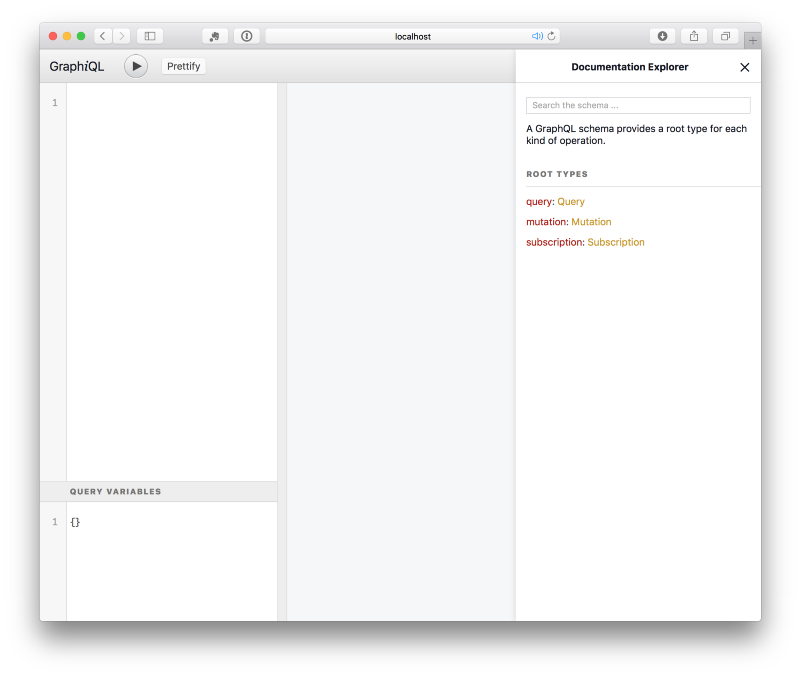
Right now the schema has nothing in it apart from some basic placeholders that CGS created for us. Let’s add our first type!
Generating types from a schema
In order for our GraphQL server to work, we need three things:
- A set of type definitions that form the schema. This outlines the set of fields that are on each type and how they are related; and so what queries can be run.
- A set of resolvers for the fields in our schema. Typically these are pretty “skinny” and pass straight through to the right method in our:
- A set of models for our types. This is the part that talks to the database, and might use an ORM. In CGS, the generated models are pretty simple and hopefully will make sense when you read them.
So how can we use CGS to generate a schema, set of resolvers and models for the schema we’ve been working with so far? Let’s get started.
We start by adding a simple TaskState type, directly in the file schema/TaskState.graphql.
| enum TaskState { | |
| TASK_INBOX | |
| TASK_PINNED | |
| TASK_SNOOZED | |
| TASK_ARCHIVED | |
| } |
We also need to require the file from schema/index.js, which we can do simply by adding the line typeDefs.push(requireGraphQL('./TaskState.graphql'));
We haven’t done much, apart from define an enum type (which doesn’t need resolvers or a model, so we haven’t done any codegen yet). Let’s create a proper type now.
Tasks
Now let’s use create-graphql-server's real capabilities. We’ll use its code generation command add-type to build out a full set of resolvers and a model for our Task type. We start by defining a simple input (which by convention we can put in input/Task.graphql):
Now we can run the code generation with the add-type command:
create-graphql-server add-type input/Task.graphqlThis command will generate three important files:
schema/Task.graphql— the real schema for aTask, which has the fields we defined above, plus some extra generated fields, likeupdatedAtandid. It also includes some query, mutation and subscription schemas to make it easy to get started with tasks. (Note that this is a.graphqlfile; CGS uses therequireGraphQLfunction to read it as a string and add it to our schema).resolvers/Task.js— the resolvers for those generated schema additions. This is the code that tells the GraphQL server how to answer queries that use the types and fields defined above.models/Task.js— the model file that actually fetches and inserts data into the MongoDBtaskcollection.
So if you run a query like { task(id: "123") { id, title, state } }, the GraphQL server will run the Query.task resolver defined in resolvers/Task.js, which ends up calling Task.findOneById(), defined in models/Task.js.
If you open up GraphiQL now, you will see a set of fields that you can query in the generated documentation. However, we don’t have any data in our database yet, so they aren’t very much use yet!
We could add data by opening up a MongoDB console directly, and inserting it with db commands, but instead, we can use the insertion mutations that CGS has generate for us to ensure the data is correctly validated. First we’ll need to define the User type, however.
Users
We generate our User type in a very similar way, starting with input/User.graphql:
| type User { | |
| email: String! | |
| hasGitHubToken: Boolean! | |
| hasTrelloToken: Boolean! | |
| tasks(state: TaskState): [Task!]! @hasMany(as: "owner") | |
| } |
The interesting part about the above is the tasks field: we decorate it with the @hasMany directive, which is a special directive to help the code generation (it won’t appear in our final schema). What that does is inform CGS that tasks is a list of Tasks associated to the User via the ownerId field on the Task (for the Task type CGS was able to infer that).
The @hasMany directive allows CGS to generate a lot of code to help us with the association between users and tasks, and even throws in some pagination for free. What we end up with in models/User.js is:
| export default class User { | |
| /* ... */ | |
| tasks(user, { state, lastCreatedAt = 0, limit = 10 }) { | |
| return this.context.Task.collection.find({ | |
| ownerId: user._id, | |
| createdAt: { $gt: lastCreatedAt }, | |
| }).sort({ createdAt: 1 }).limit(limit).toArray(); | |
| } | |
| /* ... */ | |
| } |
The only issue with the above code is that the function does not use the state variable, and so for instance, tasks(state: TASK_INBOX) and tasks(state: TASK_ARCHIVED) will return the same thing.
Understanding this logic is outside of the scope of the CGS tool, but the generated code above is just a starting point for our server, and after we have generated it, we can alter it as we see fit. In this case, we can easily change the generated code to work as we intend:
| export default class User { | |
| /* ... */ | |
| tasks(user, { state, lastCreatedAt = 0, limit = 10 }) { | |
| return this.context.Task.collection.find({ | |
| state, | |
| ownerId: user._id, | |
| createdAt: { $gt: lastCreatedAt }, | |
| }).sort({ createdAt: 1 }).limit(limit).toArray(); | |
| } | |
| /* ... */ | |
| } |
User accounts
Now we have system of users, we can set up an authorization and authentication mechanism in our GraphQL server. Luckily, CGS has done a lot of the heavy lifting for us, but we do need to set a couple of things up to get it working.
Note: CGS uses a simpleuserIdcontaining JWT-encrypted session. For security, if you deploy your server, you should make sure that connections come in via SSL to make sure that you cannot leak JWT tokens via MitM attacks (and to ensure that passwords aren’t leaked during authentication over the/loginendpoint).
CGS automatically assumes a type named User as the basis of the authentication (which luckily we have now!). It creates a REST endpoint for us called /login that we can send a email and password to, and it will look up a user with those credentials using bcrypt.
We’ve created the User type already, and in doing so CGS created a createUser mutation for us which we can use to create users. However, we need to update the generated code to accept passwords and to hash the received password before inserting the user into the db.
To do that, we need to install bcrypt, an industry standard encryption library:
yarn add bcryptThen we need to add a password field to the generated CreateUserInput type in our schema/User.graphql file:
| input CreateUserInput { | |
| email: String! | |
| password: String! | |
| hasGitHubToken: Boolean! | |
| hasTrelloToken: Boolean! | |
| } |
That input object will get passed through unmodified to the insert function on the User model; we need to update that function to hash the password:
| import bcrypt from 'bcrypt'; | |
| const SALT_ROUNDS = 10; | |
| export default class User { | |
| /* ... */ | |
| async insert(doc) { | |
| const { password, ...rest } = doc; | |
| const hash = await bcrypt.hash(password, SALT_ROUNDS); | |
| const docToInsert = Object.assign({}, rest, { | |
| hash, | |
| createdAt: Date.now(), | |
| updatedAt: Date.now(), | |
| }); | |
| const id = (await this.collection.insertOne(docToInsert)).insertedId; | |
| this.pubsub.publish('userInserted', await this.findOneById(id)); | |
| return id; | |
| } | |
| /* ... */ |
Let’s create a user and ensure this code is working.
Adding data with GraphiQL
Head to http://localhost:3000/graphiql, and try running the following mutation query:
| mutation { | |
| createUser(input:{ | |
| email: "tom@hichroma.com", | |
| password: "testpassword", | |
| hasGitHubToken:false, | |
| hasTrelloToken: false | |
| }) { | |
| id | |
| } | |
| } |
As part of its code generation, CGS has created a set of default mutations for each type to allow us to add, edit and remove database records. In this case, we are inserting a user (which should exercise our User.insert method above).
You can see how easy it is to get a basic prototyped system in place using CGS, and achieve the schema you want quickly and easily. Later, we may want to remove, or at least add authorization, to these default mutations to control access; but for now it’s very convenient to get up and running quickly.
If all goes well, we should get an id back for the user from the mutation in GraphiQL. Let’s check to see if it works with our generated /login RESTful endpoint. On the command line, we can use cURL to get a JWT token:
curl localhost:3000/login -d '{"email": "tom@hichroma.com", "password": "testpassword"}' -H "content-type: application/json"If it’s all working, we should get a response back like:
{"token":"eyJ0eXAiOiJKV1QiLCJhbGciOiJIUzI1NiJ9.eyJ1c2VySWQiOiI1OGNlMThmNTAyMjZiODZlYmY4YTNjN2UifQ.94L8T58sxT4QHEduQnYVl_V3JrT0E6eGwrEJyu_0BDo"}This is a JWT token, that encrypts the userId in such a way that the server knows you have legitimately logged in. As we’ll see in a moment, the app attaches this token to all GraphQL requests, and this allows the server to reliably know the app is acting for the user identified by the email/password above.
Typically the frontend app will store that token in local storage, much like a cookie might be used otherwise.
Adding the token on the client side
CGS will automatically authenticate requests that use this JWT token in an Authorization HTTP header. In practice, our frontend code would need to call the /login endpoint from a form handler when the user entered their credentials. The code to do so might looks something like this:
| const onLogin = async function(serverUrl, email, password) { | |
| const response = await fetch(`${serverUrl}/login`, { | |
| method: 'POST', | |
| body: JSON.stringify({ email, password }), | |
| headers: { 'Content-Type': 'application/json' }, | |
| }); | |
| const data = await response.json(); | |
| token = data.token; | |
| localStorage.setItem(KEY, token); | |
| } |
We’d need to ensure that onLogin handler is passed into a login form, and we store the resultant token.
For now, we can bypass that, and just hardwire the above token directly, in our src/index.js (back in our frontend app):
| // This is a hard-coded value obtained via cURL, but in a real app | |
| // you would read this from local storage (with localStorage.getItem(..)) | |
| // and set it on the `onLogin` handler. | |
| let token = "eyJ0eXAiOiJKV1QiLCJhbGciOiJIUzI1NiJ9.eyJ1c2VySWQiOiI1OGNlMThmNTAyMjZiODZlYmY4YTNjN2UifQ.94L8T58sxT4QHEduQnYVl_V3JrT0E6eGwrEJyu_0BDo"; | |
| const networkInterface = createNetworkInterface({ | |
| uri: `${REACT_APP_API_HOST}/graphql`, | |
| }); | |
| networkInterface.use([ | |
| { | |
| applyMiddleware(req, next) { | |
| req.options.headers = { | |
| authorization: `JWT ${token}`, | |
| ...req.options.headers, | |
| }; | |
| next(); | |
| }, | |
| }, | |
| ]); | |
| const client = new ApolloClient({ networkInterface }); |
The middleware above will be called on every GraphQL query, so we can easily store the token and pass it here after the user logs in.
Writing the me resolver
Now we have user accounts working, we can write authenticated resolvers. The principal one that this app needs is the Query.me resolver, which doesn’t make much sense when you aren’t logged in.
We’ll add this field and resolver directly, rather than doing any code generation. In general, it makes sense to use CGS to quickly generated code for basic CRUD, and then just write the code yourself when you are doing anything different.
First, we add the me field to the Query type additions in schema/User.graphql:
| extend type Query { | |
| users(lastCreatedAt: Float, limit: Int): [User!] | |
| user(id: ObjID!): User | |
| me: User | |
| } |
Second, we write the resolver, which simply uses context.user, as CGS automatically makes that available to us:
| const resolvers = { | |
| /* ... */ | |
| Query: { | |
| /* ... */ | |
| me(root, args, { user }) { | |
| return user; | |
| }, | |
| }, | |
| /* ... */ | |
| } |
Adding some Tasks
Now that our Query.me resolver is working, we should test our User.tasks resolver works too — but we’ll need to create some tasks first. We can do this in the same way that we created a user; we just need to ensure we associate the tasks by adding a ownerId field. We use the id that we got back from our user creation earlier (if you forgot it, you can decode your JWT token here to figure it out!):
| mutation { | |
| createTask(input: { | |
| title: "Build Taskbox", | |
| ownerId: "58ce18f50226b86ebf8a3c7e", | |
| state: TASK_INBOX, | |
| subtitle: "following the article" | |
| }) { | |
| id | |
| } | |
| } |
When you run the query above, all going well, you should get a an id returned. In my case, it was “58ce0cebd68d4c6bf7ac1150”. We can now double check everything worked by running a query in GraphiQL to get it again:
| { | |
| task(id: "58ce0cebd68d4c6bf7ac1150") { | |
| title | |
| subtitle | |
| state | |
| owner { | |
| } | |
| } | |
| } |
(You’ll need to change the id in the query, but hopefully you should see some data!).
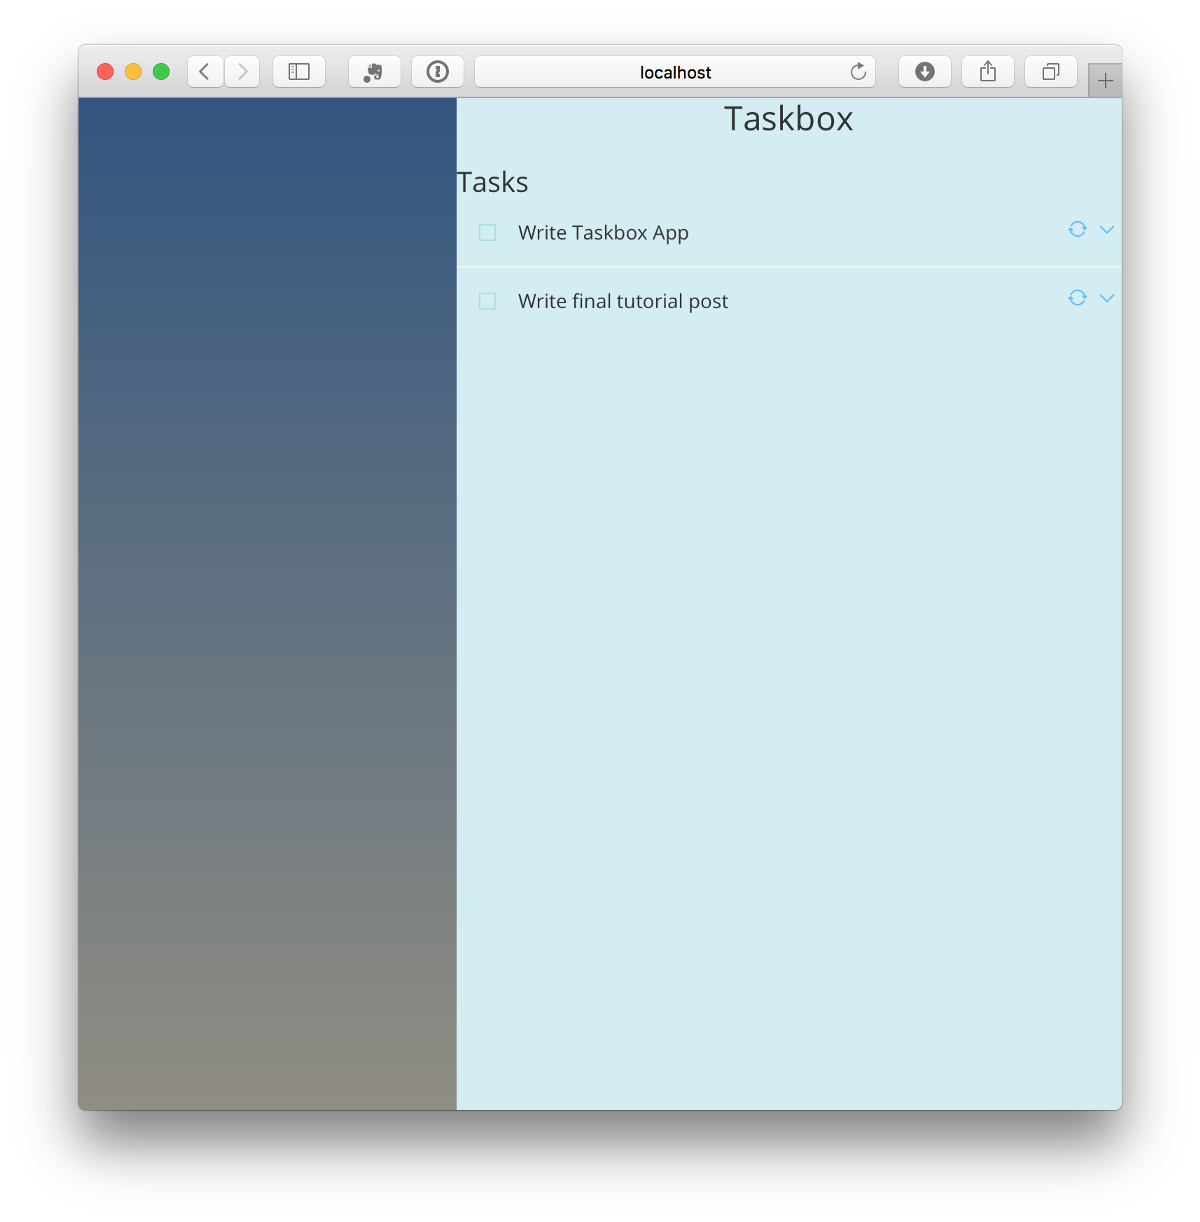
If we go ahead and create a few tasks in different states, we should have enough data to run our frontend against the server!
Running against our client
Once we’ve followed the above process, we’ve built enough of the schema to allow our client to run its queries. If we insert a couple of tasks that are attached to our hardcoded user, when booting up the client we should see that list of tasks in our UI.
Remember: if you get in trouble, you can always use the excellent Apollo Developer Tools from within the client app to run arbitrary queries directly using our authentication token.
Cleaning up the server
One of the advantages of CGS is all the auto-generated “admin” mutations, and root queries it creates, such as createUser and task(id: ObjID!). These are super-handy when getting started, but you will want to secure things properly before taking your server into production.
You can either simply delete the relevant fields from the schema and resolver files, or just lock down the resolvers to admin users by adding a line like:
| const resolvers = { | |
| TypeName: { | |
| resolver(doc, args, { user }) { | |
| if (!user || !user.admin) { | |
| throw new Error("Admin access required"); | |
| } | |
| /* original implementation */ | |
| }, | |
| }, | |
| }; |
Conclusion
These posts have followed the process of building our Taskbox app from the first product imaginings to the point of having a working UI talking to a real GraphQL server. I hope you’ll agree that Component-Driven Development paired with a schema-first process makes sense, and is an excellent way of partitioning app building into manageable pieces.
If you are interested in Taskbox to help your day-to-day workflow, you might want to check out this page about a full version of the product we’ve been trialling at Chroma.
This series hasn’t aimed to be a completely comprehensive tutorial about how to build out the app from start to finish; there is still much to do, including building out the remaining screens, syncing data with third party services on the backend and deploying the finished application. If you’re interested in these topics, let me know in the comments and sign up to the mailing list to hear about future articles!
Read the entire series now:
 Tom Coleman